Merging and splitting data#
In this chapter, you will learn how to merge and split data, and in what cases it might be useful to perform these operations.
Merging data#
In some cases, you might need to merge (combine) and process data from different sources.
Merging data can involve:
- Creating one data set from multiple sources.
- Synchronizing data between multiple systems. This could include removing duplicate data or updating data in one system when it changes in another.
One-way vs. two-way sync
In a one-way sync, data is synchronized in one direction. One system serves as the single source of truth. When information changes in that main system, it automatically changes in the secondary system; but if information changes in the secondary system, the changes aren't reflected in the main system.
In a two-way sync, data is synchronized in both directions (between both systems). When information changes in either of the two systems, it automatically changes in the other one as well.
This blog tutorial explains how to sync data one-way and two-way between two CRMs.
In n8n, you can merge data from two different nodes using the Merge node, which provides several merging options:
- Append
- Combine
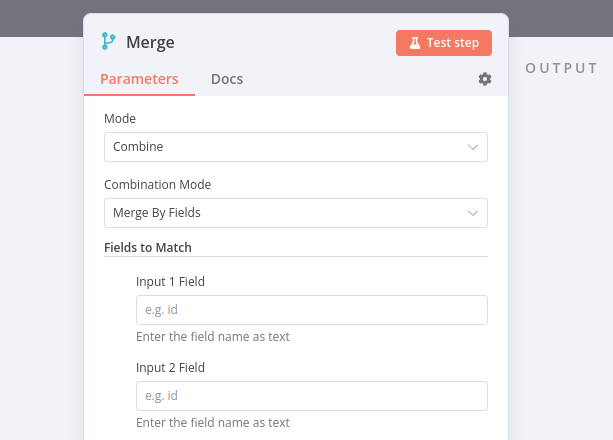
- Merge by Fields: requires input fields to match on
- Merge by Position
- Multiplex
- Choose Branch
Notice that Combine > Merge by Fields requires you enter input fields to match on. These fields should contain identical values between the data sources so n8n can properly match data together. In the Merge node, they're called Input 1 Field and Input 2 Field.

Property Input in dot notation
If you want to reference nested values in the Merge node parameters Input 1 Field and Input 2 Field, you need to enter the property key in dot-notation format (as text, not as an expression).
Note
You can also find the Merge node under the alias Join. This might be more intuitive if you're familiar with SQL joins.
Merge Exercise#
Build a workflow that merges data from the Customer Datastore node and Code node.
- Add a Merge node that takes
Input 1from a Customer Datastore node andInput 2from a Code node. - In the Customer Datastore node, run the operation Get All People.
- In the Code node, create an array of two objects with three properties:
name,language, andcountry, where the propertycountryhas two sub-propertiescodeandname.- Fill out the values of these properties with the information of two characters from the Customer Database.
- For example, Jay Gatsby's language is English and country name is United States.
- In the Merge node, try out different merge options.
Show me the solution
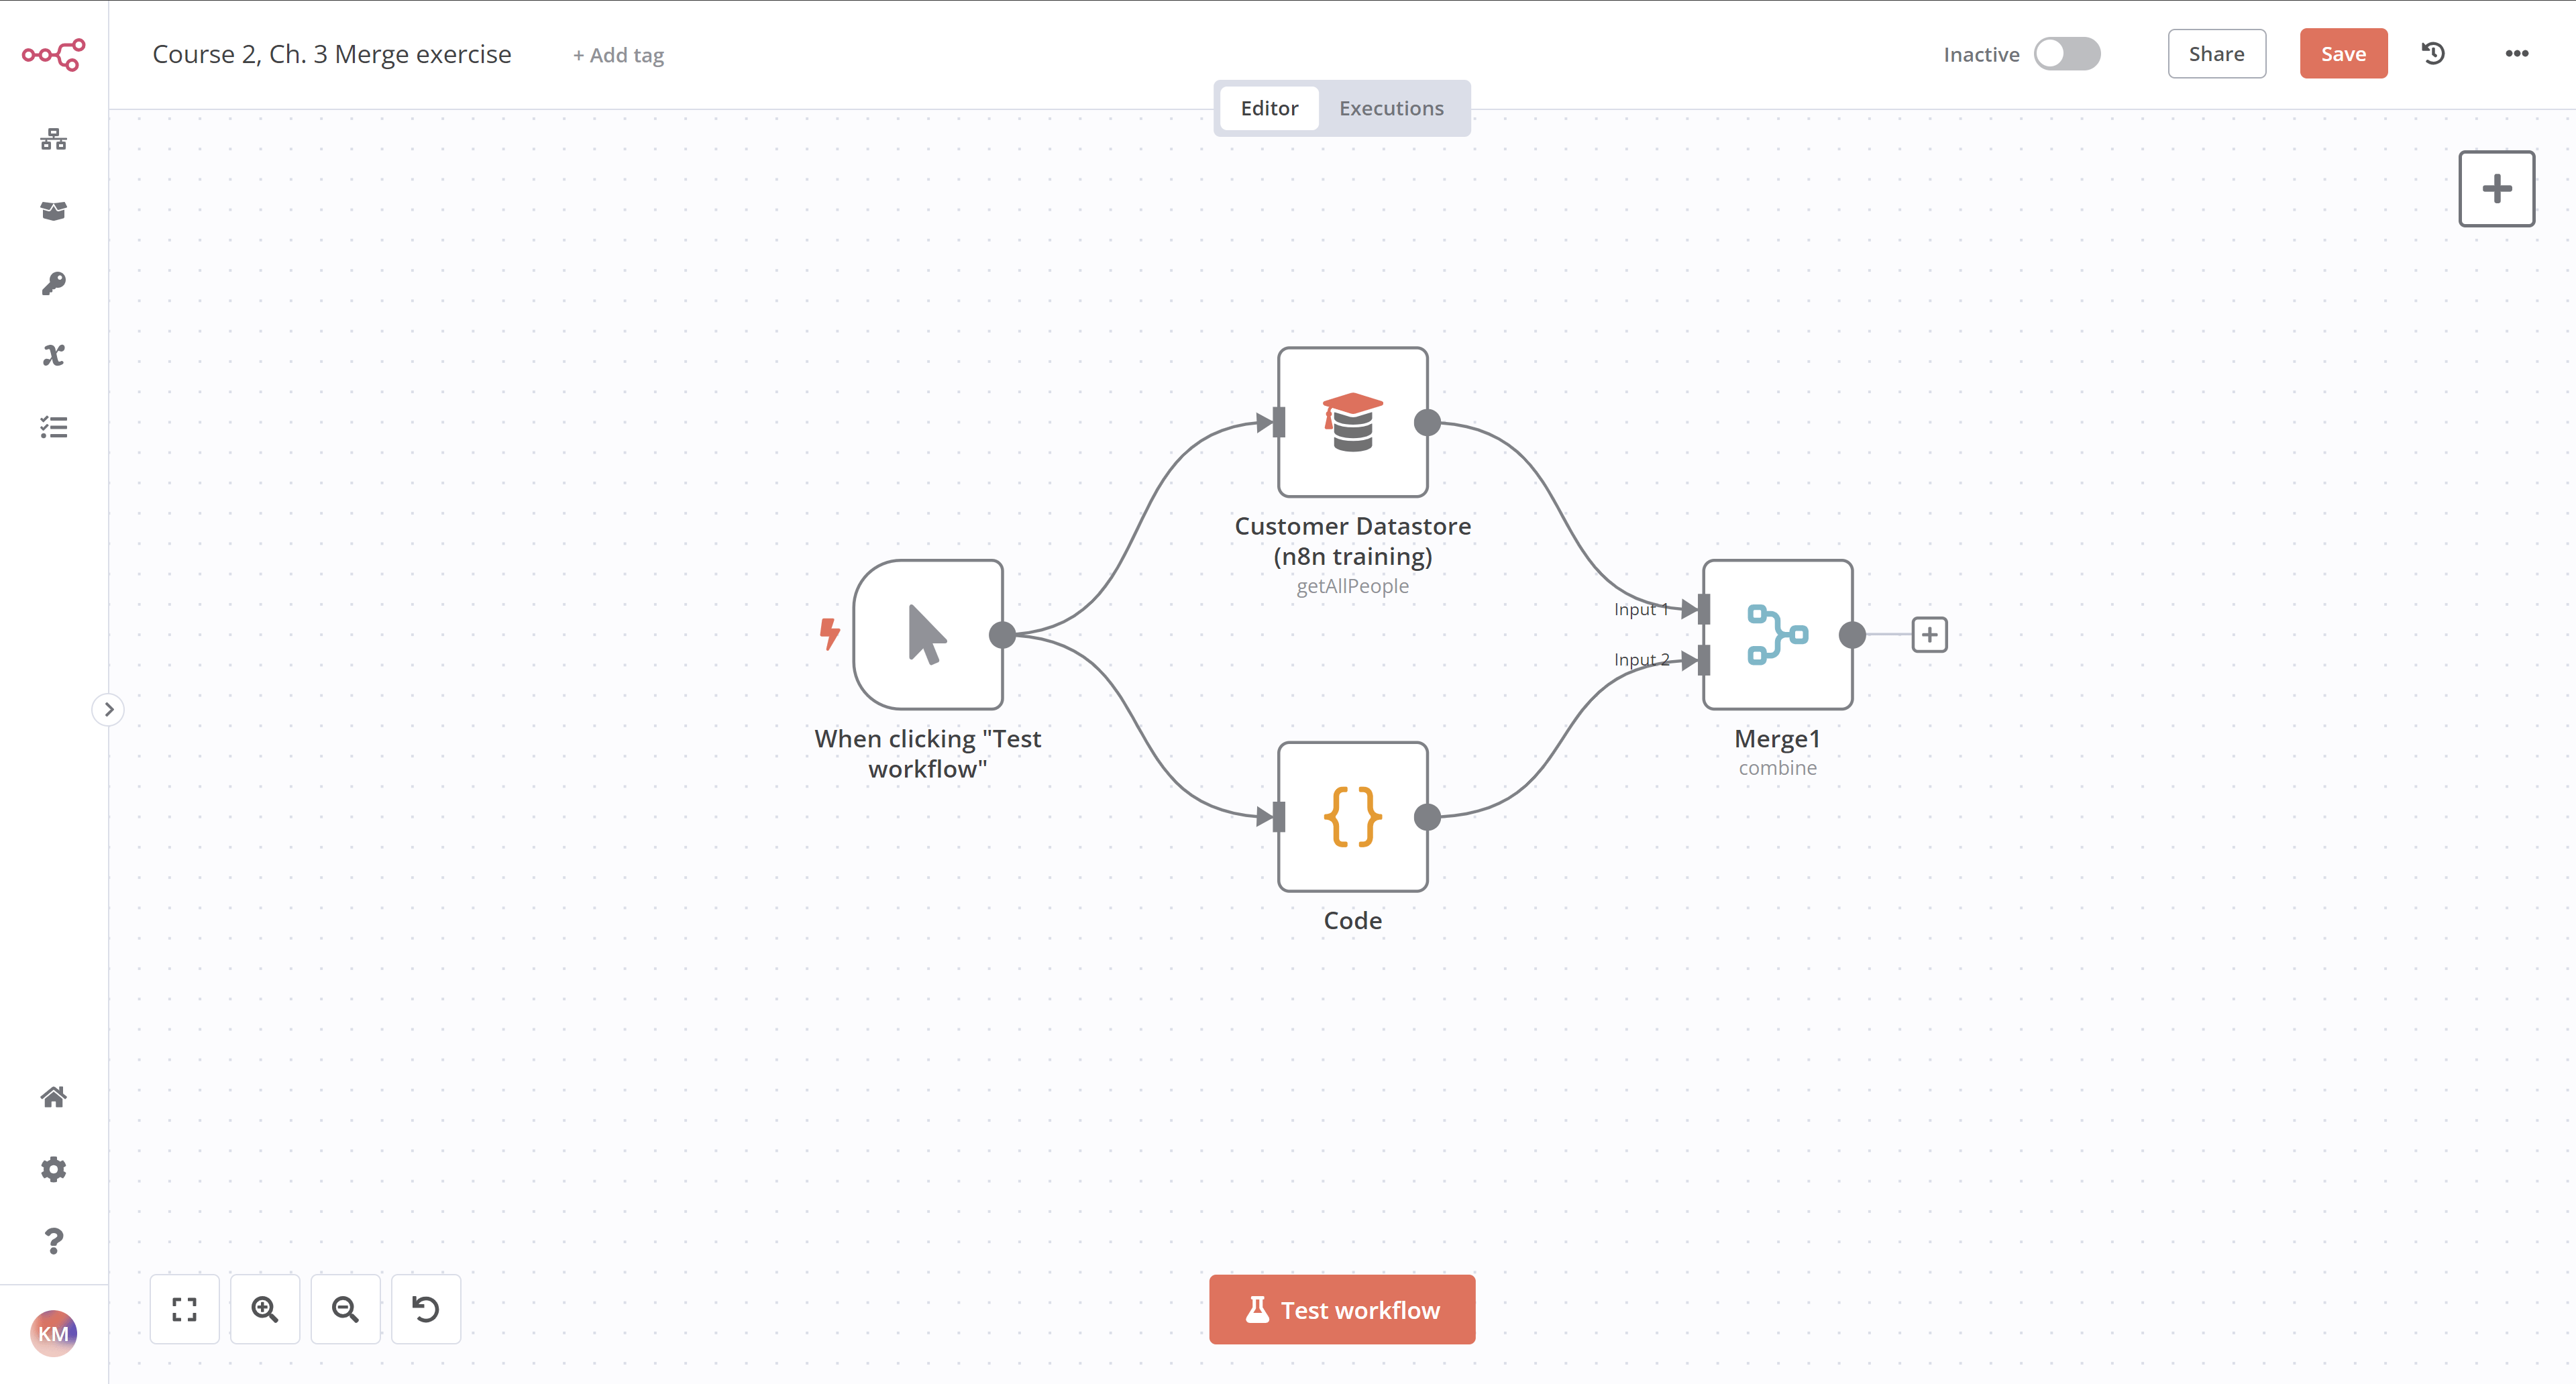
The workflow for this exercise looks like this:

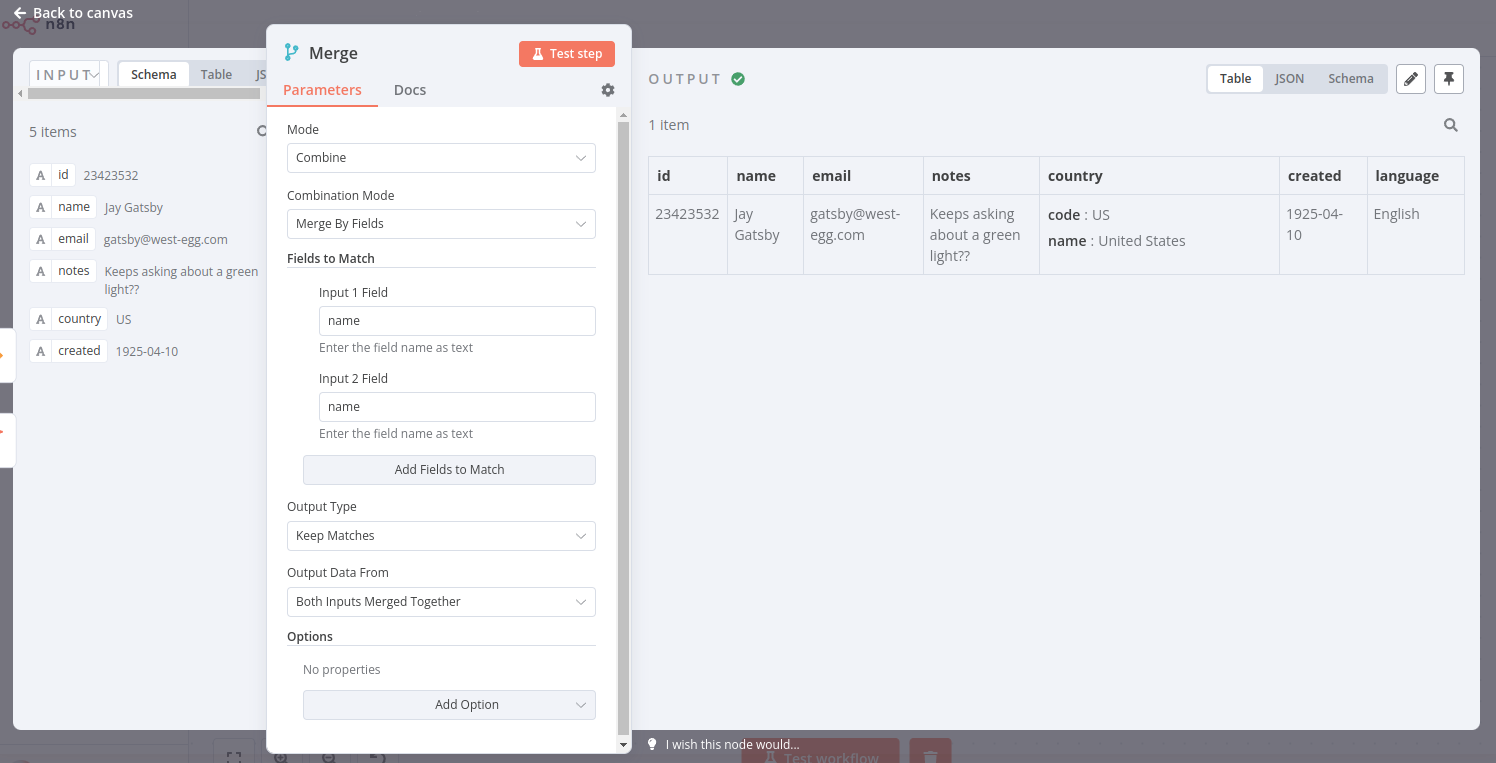
If you merge data with the option Keep Matches using the name as the input fields to match, the result should look like this (note this example only contains Jay Gatsby; yours might look different depending on which characters you selected):

To check the configuration of the nodes, you can copy the JSON workflow code below and paste it into your Editor UI:
1 2 3 4 5 6 7 8 9 10 11 12 13 14 15 16 17 18 19 20 21 22 23 24 25 26 27 28 29 30 31 32 33 34 35 36 37 38 39 40 41 42 43 44 45 46 47 48 49 50 51 52 53 54 55 56 57 58 59 60 61 62 63 64 65 66 67 68 69 70 71 72 73 74 75 76 77 78 79 80 81 82 83 84 85 86 87 88 89 90 91 92 93 94 95 96 97 98 99 100 101 102 103 104 105 106 107 108 | |
Looping#
In some cases, you might need to perform the same operation on each element of an array or each data item (for example sending a message to every contact in your address book). In technical terms, you need to iterate through the data (with loops).
n8n generally handles this repetitive processing automatically, as the nodes run once for each item, so you don't need to build loops into your workflows.
However, there are some exceptions of nodes and operations that will require you to build a loop into your workflow.
To create a loop in an n8n workflow, you need to connect the output of one node to the input of a previous node, and add an If node to check when to stop the loop.
Splitting data in batches#
If you need to process large volumes of incoming data, execute the Code node multiple times, or avoid API rate limits, it's best to split the data into batches (groups) and process these batches.
For these processes, use the Loop Over Items node. This node splits input data into a specified batch size and, with each iteration, returns a predefined amount of data.
Execution of Loop Over Items node
The Loop Over Items node stops executing after all the incoming items get divided into batches and passed on to the next node in the workflow, so it's not necessary to add an If node to stop the loop.
Loop/Batch Exercise#
Build a workflow that reads the RSS feed from Medium and dev.to. The workflow should consist of three nodes:
- A Code node that returns the URLs of the RSS feeds of Medium (
https://medium.com/feed/n8n-io) and dev.to (https://dev.to/feed/n8n). - A Loop Over Items node with
Batch Size: 1, that takes in the inputs from the Code node and RSS Read node and iterates over the items. - An RSS Read node that gets the URL of the Medium RSS feed, passed as an expression:
{{ $json.url }}.- The RSS Read node is one of the exception nodes which processes only the first item it receives, so the Loop Over Items node is necessary for iterating over multiple items.
Show me the solution
- Add a Code Node. You can format the code in several ways, one way is:
- Set Mode to
Run Once for All Items. - Set Language to
JavaScript. - Copy the code below and paste it into the JavaScript Code editor:
 1
 2
 3
 4
 5
 6
 7
 8
 9
10
11
12
13
let urls = [
	{
		json: {
		url: 'https://medium.com/feed/n8n-io'
		}
	},
	{
	json: {
		url: 'https://dev.to/feed/n8n'
		}
	}
]
return urls;
- Set Mode to
- Add a Loop Over Items node connected to the Code node.
- Set Batch Size to
1.
- Set Batch Size to
- The Loop Over Items node automatically adds a node called "Replace Me". Replace that node with an RSS Read node.
- Set the URL to use the url from the Code Node:
{{ $json.url }}.
- Set the URL to use the url from the Code Node:
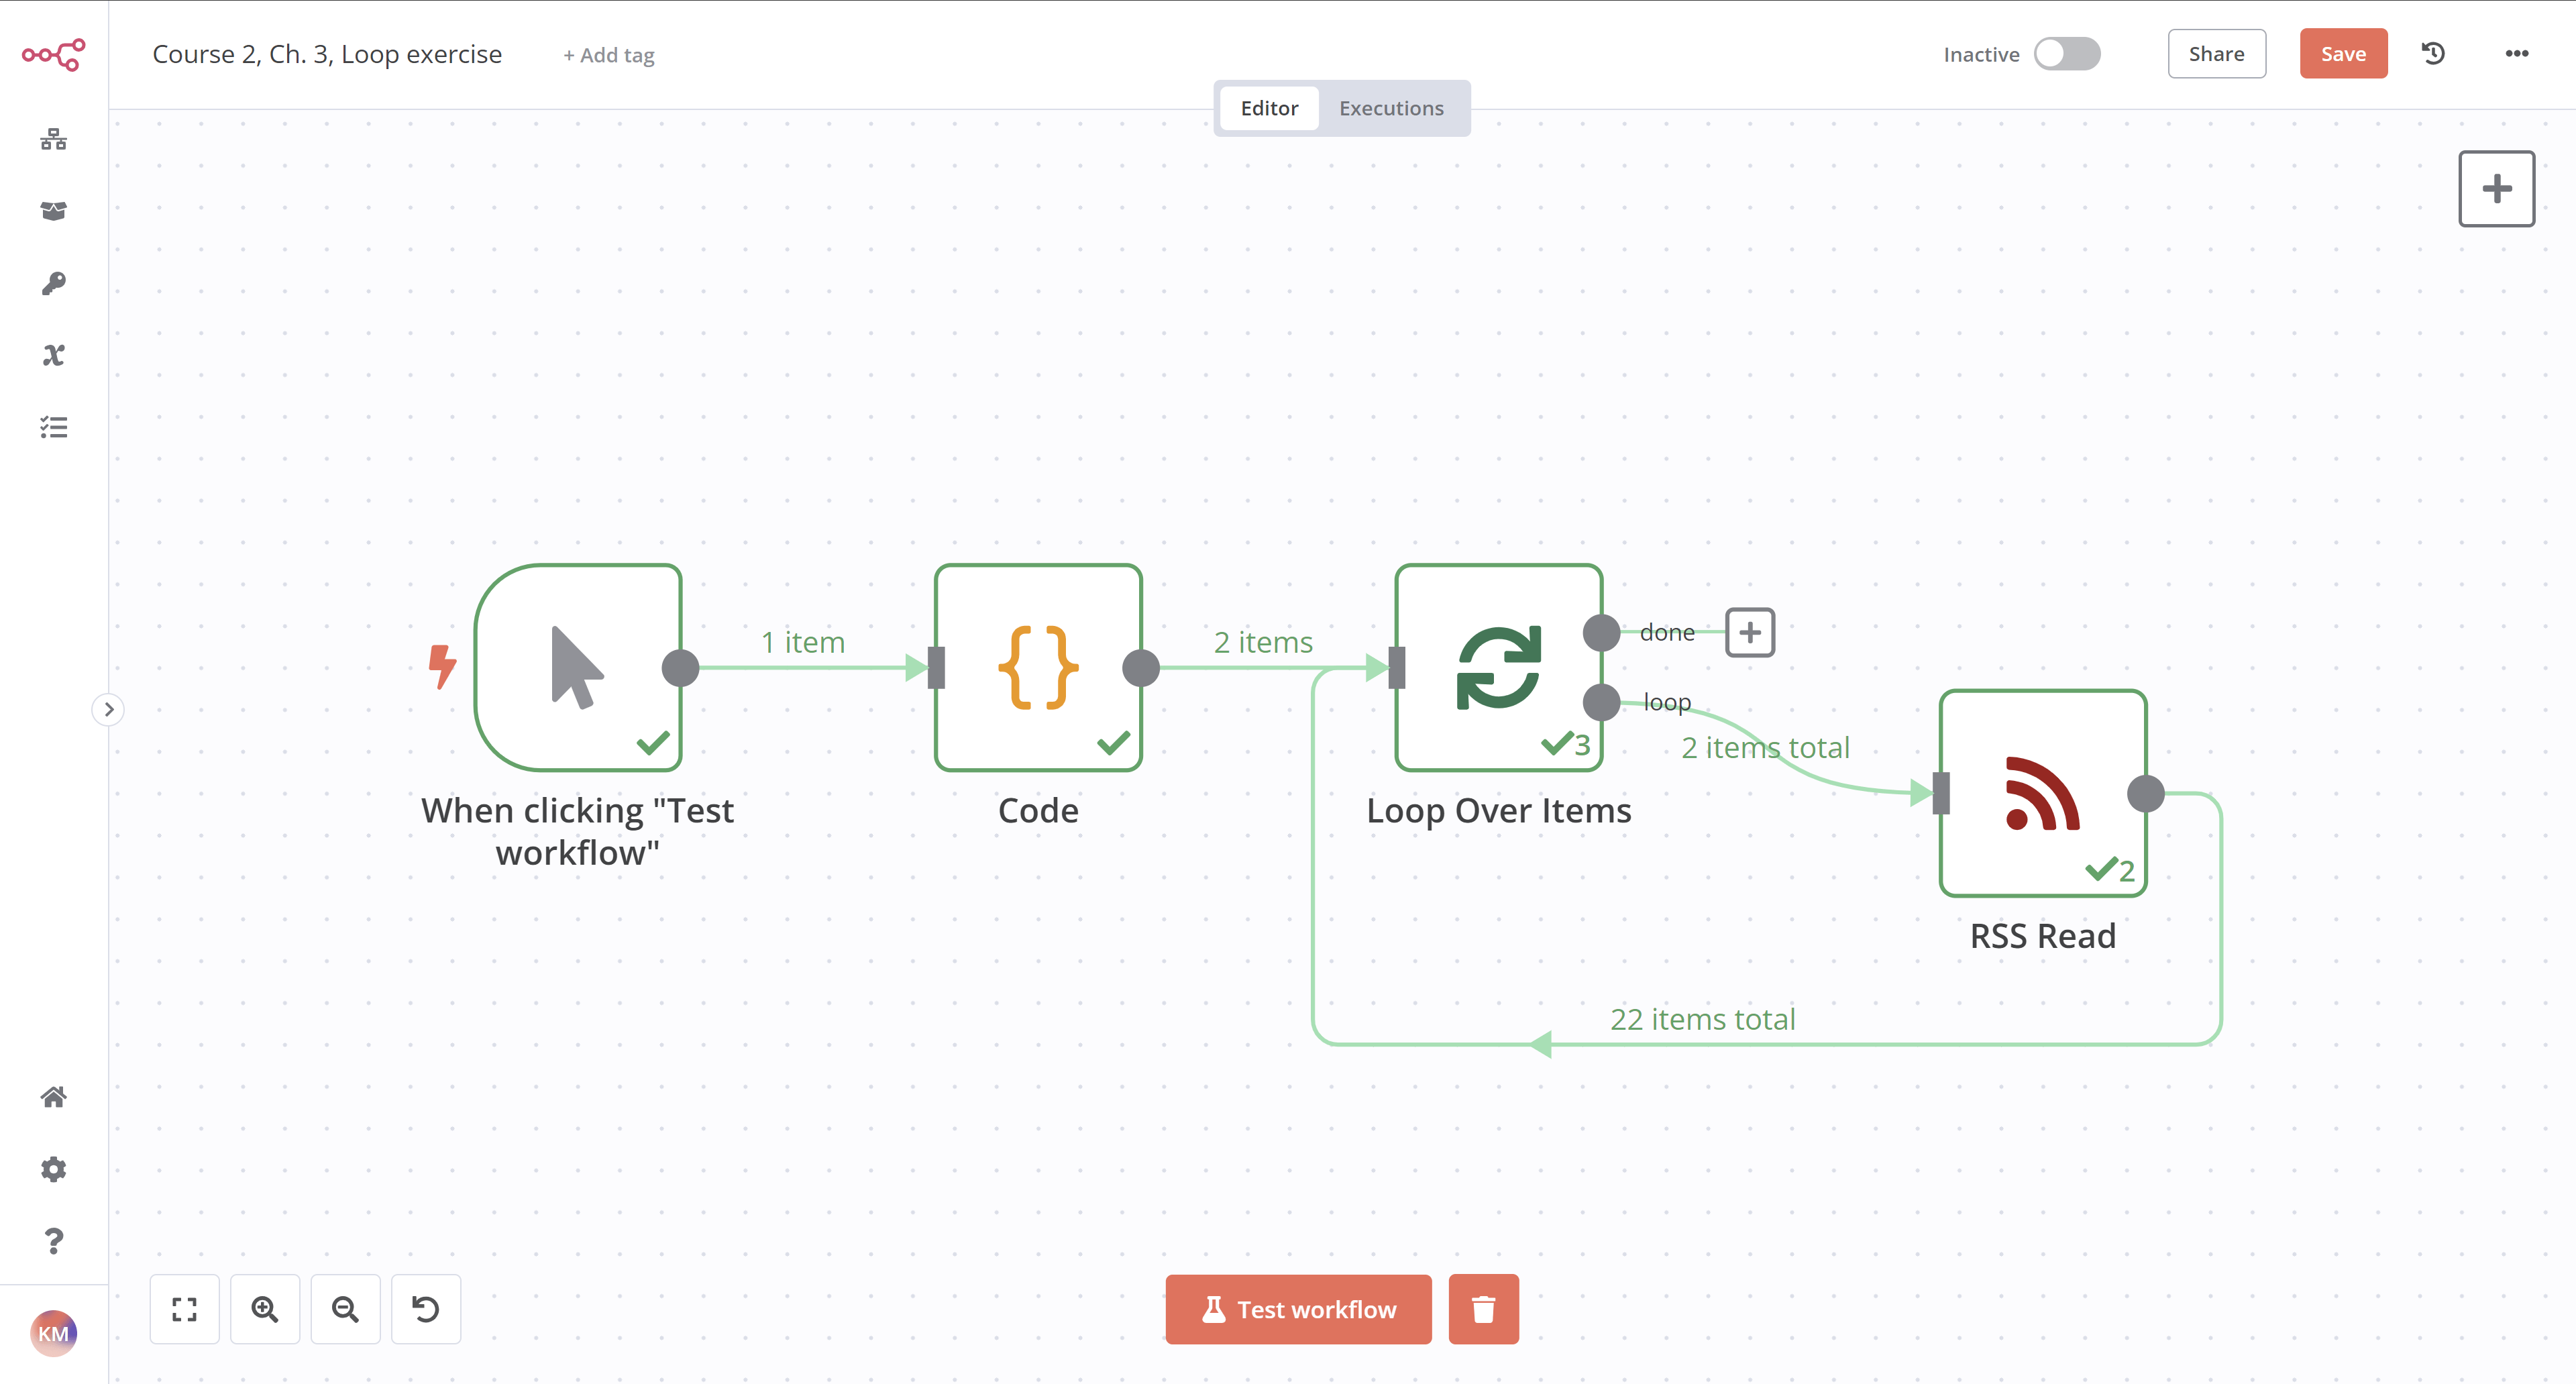
The workflow for this exercise looks like this:

To check the configuration of the nodes, you can copy the JSON workflow code below and paste it into your Editor UI:
1 2 3 4 5 6 7 8 9 10 11 12 13 14 15 16 17 18 19 20 21 22 23 24 25 26 27 28 29 30 31 32 33 34 35 36 37 38 39 40 41 42 43 44 45 46 47 48 49 50 51 52 53 54 55 56 57 58 59 60 61 62 63 64 65 66 67 68 69 70 71 72 73 74 75 76 77 78 79 80 81 82 83 84 85 86 87 88 89 90 91 92 93 94 95 96 97 98 99 100 101 102 103 104 105 106 107 | |